Beginner · Betta · Introducing · Planted tank

Basic Betta Care

Image may contain: plant, flower, nature and outdoor

The betta is probably the most well-known fish in the world following the gold fish. These fish are highly prized for their amazing fins and bright colors. They also have a very friendly temperament for a fish and are almost always interested on the adventures of the world outside of their tank. They are criminally misunderstood. Most bettas are seen living in small little cups at the pet store only to be moved into small little bowls and vases. Some of these fish make it but a majority live a shortened life at best. Let’s look at how to care for your new betta!

Habitat

Image may contain: plant and outdoor

So this is where most bettas lose a lot of their life span. The Betta is a very flexible fish. They are one of the few fish in the ‘Labyrinth’ category meaning they contain the labyrinth organ. It is a very basic lung which allows them to breathe air out of water for short periods of time. Because of this, the betta should always have access to air to ‘gulp’.  This is an evolutionary advantage for the wild betta that tends to live in rice fields and must jump from puddle to puddle when the water gets too low. Their fins also allow the betta to pull themselves along like rudimentary arms. This is not a behavior you should see in a kept betta.(1)

The tank at MINIMUM should be 5 gallons, ideally 10. Yes, technically a betta can live in a 2 gallon bowl in the same way you can technically live in a small studio apartment. Except you can’t leave to go to the park, you know cause you’re in a bowel… and you’re a fish. Bowls also aren’t a great shape for bettas. Bettas like swimming back and forth so a bowl won’t get them the length they really enjoy. Tanks should always be cycled before adding any fish. Because of the betta’s ability to jump, a lid should be used at all times. (2)

A filter is needed to clean the water and remove ammonia. It can provide too much flow so sponge filters are best for the betta’s very delicate fins. A heater is also needed; bettas are tropical fish and must be kept in water in the high 70s at their coolest.

Plants are awesome for a betta tank. They look great and bettas also love the greenery. The bettas wont hurt the plants but they do love rubbing along them and through them. Mine enjoys hiding behind my Anubis.

Fake decorations are also fine but keep in mind that betta’s fins are delicate and can rip or tear easily. Sharp edges and wires should be avoided.  (2)

Tank Mates

Image may contain: plant

Bettas are notorious for their other name ‘the fighting fish’.  They do not get along with other males or even most flashy similar sized fish but that doesn’t mean you can’t have anything else in the tank. Smaller schooling fish like tetra and bottom feeders like plecos can work sometimes depending on the temperament of your betta. Snails are usually a win in the betta department but be warned they may snack on the babies. Same goes with shrimp.  (3) Females can be housed together ocassionally but mine have never gotten along so be wary. The main fish that should be avoided are bigger flashier fish, any kind of agressive or semi-agressive fish, and fish that may nip at the betta’s long fins.

Food

Image may contain: plant and outdoor
Begging for Food at the top of the tank

Overfeeding is another consistent problem with bettas. They need to be fed 2-3 times a day, the size of their eye. I know that sounds weird but it is easier to visualize the very small amount a betta should be eating. I feed one pellet that I have crushed up for mine. It doesn’t look like enough but it is.

While the mass marketed flake food is easy, cheap, and may be taken by your betta it’s not the best for your fish or your water. The flakes start degrading when they hit the water. Higher quality betta pellets are the best for your betta. Look for ones specifically formulated for betta to improve color and fin health. Bloodworms are a great treat to be provided to your betta on occasion but they offer very little in the way of nutritional value if they aren’t live. (2)

Sexing

Image may contain: plant
Female Betta in her tank

Thankfully bettas are rather easy to sex and will be sexed by the store you purchase at. Males have longer fins and beards; they also tend to be more colorful and dramatic. If you have interest in breeding I recommend some serious research. Most babies will be ‘cull-grade’ which means you most likely won’t be able to sell the babies so if you aren’t interested in culling then be prepared to have a ton of room.

Behavior

Image may contain: plant and outdoor

Flaring is a common behavior in bettas. The bettas will push out their beard (a flap of skin by the gills) and flip out their fins to their fullest while facing you (or whatever they have decided invaded their territory).  They do this even when happy, try not to take it personally.

Building a bubble nest is a common behavior in happy bettas. This is a result of the labyrinth organ (1). They will blow bubbles on the surface of the water in hopes of convincing a female to lay her eggs there. They will do this even without a female present.

Rubbing against plants can be a way of itching and staking out territory or hunting.

Resting on leaves is a common way for bettas to handle their huge and heavy fins. Providing a rest for them about halfway up the tank is a good spot for them.

Types

Bettas come in a wide array of colors and fin types. While it is not an exhaustive list this is an excellent place to start. Most local pet stores will have standard and crown tail bettas for around 5 dollars. The other types tend to get pricy with some types maxing out in the 100$ range. I recommend reddit.com/r/bettafish for any show quality bettas.

http://www.theaquariumguide.com/articles/betta-fish-series-types-of-betta-fish


Common Questions

My betta is changing colors! Is he okay?

Yes, it is completely normal. Certain bettas can change color all throughout their lives. If you have a new betta this just means you are taking great care of him and he is healing from the conditions at the store. If he is older the color changes will be more subtle but still can happen. What do DON’T want to see is a bright and colorful betta becoming dull and gray. This indicates a toxic environment. (4)

How can I keep more than 1 betta in a tank?

Males, it’s got to be a huge tank. Perhaps a 40 gallon Long (breeder). Females can live in the same tank but they also have aggression and it can lead to death. If you want them in the same tank, say a split 20 gallon, you can buy or make a tank divider. It is like a screen that splits the tank down the middle but still allows water flow through it. Plants can hide it or create a false ‘wall’ around it to prevent the bettas from seeing one another. (3)

I found my betta on the floor, what do I do?

Don’t panic. The betta can survive out of water much longer than most fish. First thing to do is put it back in the bowl and place a covering over.

Second, prepare a shallow dish or bowl with clean dechlorinated water to move the betta into. It should be about 2x times the height of the betta so it still covers him but is low enough he can easily get water.

Third, move the betta to the new container and examine him. Put a lid on the continer once he is move. Inspect the fins for damage, it may be totally normal for the betta to be laying on the bottom of the water.  Watch him closely and if he can’t make it to the top of the water gently life his body so he can gulp air every 15 min. If your betta’s gills are not moving, he is not gulping air or he is dried out, your betta is dead. If you see any of these signs or any movement he still stands a chance. Let him stay alone in this tank to heal. (5)

Lastly, if your betta has made it check his tank water. Bettas can jump for many reasons: being startled, seeing something outside the tank (like  another male, or what they think is one), or even looking for food. The most common reason however is water quality, if the water becomes toxic or dirty a betta may jump in search of another puddle. This is why it is important to cycle EVERY tank.

What is this white line on my betta’s fins?


It depends. If there are spots that are rounded and fuzzy your betta may have ick. It’s a common aquarium fungus that rarely kills fish but does make them itch. You may notice your betta rubbing on plants and substrate. This can be easily treated by jumping the temp up to 84 for about a week.

If it is just on the outside of the fins then you have a growing betta! This can mean they are growing do to age or regrowing damaged fins. This can happen months after you bring them home from the pet store or after an injury. Don’t worry, as long as you keep an eye on any injuries for infection he should be fine. (5)

Sources:

  1. https://www.thespruce.com/what-is-a-labyrinth-fish-1380796
  2. http://japanesefightingfish.org/betta-fish-care/
  3. http://www.theaquariumguide.com/articles/betta-fish-series-suitable-betta-tank-mates
  4. http://pets.thenest.com/bettas-change-color-4520.html
  5. https://www.quora.com/How-do-you-help-a-Betta-regrow-its-fin


Beginner · Introducing · Inverts · Snails

Red Ramshorn Care

The Colored  RamshornSnail is a beautiful aquatic inhabitant that is perfect for almost any aquarium. The red ram shell named according to its colored body and spiral shell. Their bodies can be red, golden, brown, black, and  blue. They grow to be about ½ inch or 1.5 cms. They are great aquarium cleaners and algae eaters. Mine even eat hair algae, a bane of an aquarist life.  This article will feature the red Ramshorn as it is my favorite. I will preface this article by saying this information is a combination of personal exploration of the ramshorn snail and general snail care.


Image may contain: plant, nature and outdoor
The red ramshorn

Water parameters

These little guys are tough. A genetic offshoot of the pest snail the common Ramshorn they are built to withstand almost anything aquarium living can throw at them. Really, I had some shipped and then lost on a plus 100 degree day (don’t order or ship when it’s hot if you can avoid it) and while the box showed up at my door still hot to the touch,  NONE of these guys were dead or even seemed bothered by it. They are tropical by nature but can live in almost any temperature water (tropical is really just best though).

They need to be in a cycled freshwater tank (0,0,20 and below) with dechlorinated water (as one should with any aquatic animal) but they are able to survive through otherwise disastrous situations. For example, an ammonium spike may kill off an entire population of shrimp or mystery snails. It is completely possible that some if not all of your red Ramshorn will survive! Certain water may need to be treated with calcium if shells appear thin and brittle.

Image may contain: plant
Ramshorn next to a mystery snail

Habitat

Red Ramshorn love decaying vegetation. A planted tank is a perfect place for them as they will help clean up any algae and dead leaves without hurting the living plant tissue. I always feed mine a bit extra in the form of fish pellets just in case they decide to chew away at my dwarf sag. Just drop in the occasional blanched zucchini to really make their day and you are set. If you are interested in truely spoiling your snails here is an excellent recipe for Snail Jelly.

Image may contain: plant, outdoor, food and nature
Red Ramshorn eating hair algae


Tank Mates

There are very few fish that the Red Ramshorn cannot stay with. However, if you wish for them to breed puffers, bettas, and any other mollusk eating fish should be avoided as they will eat any babies and possibly adults if the fish is large enough). Tank mates should also be tropical to keep the snail in its ideal temperature. They get along with other inverts but Assassin Snails will eat their eggs and young.

Image may contain: plant and flower
A Red Ramshorn crusing by his betta roomate

Breeding

These guys are hermaphroditic and will reproduce readily. If you wish to encourage this make food plentiful! But be warned they can easily overrun a tank. The Red Ramshorn is a recessive genetic line of the common Ramshorn. As such it is very important to remove any Common Ramshorn from the tank if you wish to maintain the line. If you don’t your entire tank will end up full of brown Ramshorns.

No automatic alt text available.
An adult, juvenille and baby ramshorn

Population Control

So maybe you want 1000 of these. Maybe you probably just want 20 max. They can easily overrun a tank so here are some solutions to maintaining a population (from easiest/most effective to hardest/least effective).

Image may contain: food
A Bulk order of Red Ramshorn before being shipped off

Prevention: Always first. The best way is to isolate your new plants. This is usually how people end up with snails. The snails lay eggs on the plants or ride in themselves. While pet stores are getting better at avoiding it it can still happen. Just quarantine your new plant for about a week if you can. Otherwise a quick salt dip can clear out any unwanted visitors.

Control feeding: Don’t over feed. These cleaners will often pick uneaten fish food off the bottom of the tank. This is good for your water parameters but bad if you want to keep population down. If not starting with an infestation this is a good way to keep populations stable.

Assassin snails:  These guys eat the eggs of Ramshorn and the babies that just hatched. Usually a few can sneak by to allow the population to refresh itself. They will eat other snails and eggs that are housed in the same tank so be wary.

Feeder snails: I love these guys. But I also recognize fish have to eat too. Many people control their population by feeding off to mollusk eating fish. They allow the colony to infest in order to maintain a ready food supply. I am not saying to just buy a pufferfish without doing research to deal with your snails. But, if you were already thinking of getting one, they make a great colony.

Picking them out by hand: This almost never works. You keep the population down but eventually there are just too many that get away. Or you catch all of the bigger ones and the babies still hide until they are big enough to notice (and big enough to lay more eggs). You can drop a blanched zucchini in to bait them to the front and repeat. If you do remove them it is important to give them a swift death by crushing their shells. Never EVER release them into the wild. They will live a short painfully unhappy life and can royally destroy an ecosystem. Try seeing if anyone locally would like some snails! If not they can be quickly squished between a thumb and index finger for a quick death.

Salting the water:  This is at the bottom of the list because while it is effective it will kill off your whole population and most likely any fish you are keeping as well. If you are breaking down a tank and want to kill off any stragglers heavily salt the tank water (after removing fish, plants, snails you wish to keep) and then drain and allow the substrate to dry. Before you use the tank, substrate or decorations again be sure to clean and rinse them thoroughly. Really, don’t try to do this with living snails. Try to pick them all out if you can, this is more of a ‘good practice’ method.

Thank you for visiting! Please direct any questions to the ‘contact’ page!

Axoltols · Beginner

Axolotl Morphs (Typing)

Axolotls come in a veritable rainbow of colors! Well at least as far as most any singular species on earth does. A few fish are known to have varying colors, like my beautiful bettas, within a species but most must be classified under a different species (like cichlids)!  Not so with the axolotl!

I mentioned this in ‘So you have a sick lot’ post, but man! ScientistLOVE  these little guys and who can blame them. The axolotls color type, or morph if you want to get technical (and I ALWAYS do) is based on a combination of 4 (possibly 5) different genes.

Let’s start with some key terms. I am going to over simplify this so it may be used as a starting off point that you can educate yourself further with if you would like. http://www.axolotl.org/genetics.htm  or Caudata is a great source for more detailed explanations. Feel free to skip this part if you have no interest in breeding or genetics.

Definitions

Gene: Each organism on this planet that was produced by 2 parents has a set of genes that produce a characteristic. This can be why your hair is brown or why a flower is red. On gene in the pair comes from the ‘mother’ and one from the ‘father’.

Dominant gene: A gene that will always show its trait if it is present. This means that as long as one dominant gene is present in the pair, it will result in the trait. This is why dark hair children are most often born to parents who are dark and light haired however there are exceptions we will go into another day. This does not however make the other gene go away forever, it just isn’t seen.

Recessive: A gene that will only show its trait if no dominant gene is present.  This is why blond haired parent produce blond haired children. Many of the traits we will be talking about today are recessive. These lots have been carefully bred for generations; that took a lot of time and effort. It does not make them better than the dominant type but it will make them rarer.

(FYI) Incomplete dominant: This is not related to axolotls. This is when a gene takes some traits from both pairs. So if you have a red flower and white flower as ‘parents’ you get a pink one. Many animals do have incomplete dominant traits including humans (skin color) but lots do not. At least when it comes to color.


The genes

The dark gene:

Dominant: This gene controls dark color within the lot by mixing natural pigment (controlled by the albino gene) with yellow coloring.

Recessive: Axolotl will have no yellow/green coloring

The GFP gene:

Dominant: Controls green florescent protein which presents under black light as a bright green glow. It is not advised to keep them under the black light too long as it bothers axolotl’s eyes.

Recessive: No glow.

The melano gene:

Recessive: Lack of iridophores. Individuals also tend to be very dark in color although some are lighter.

The albino gene:

Recessive : Most of us have heard or seen albinos. They exist in axolots as well. Albino genes control the creation of pigment. (separate from the ‘dark gene’

The axanthic gene:

Recessive. Not much is really known about this gene in lots as the ones that present the gene just recently have been able to survive to adulthood. It acts on xanthophores which control the yellow/ red/ orange pigment within an animal and iridophores which control shininess. When two axanthic genes are possessed they lack the ability to create these pigments.

The copper gene:

Recessive. Still under investigation. It is not clear which cells or pigments this acts upon. This is only seen in albino animals currently (thus they have red eyes) but some strains are being claimed as coppers in other parts of the world that are genetically isolated from the US where most axolotls are studied that do not have red eyes. The result of possessing two copper genes is a light brown lot.


Okay! Let’s start typing!

Wild Type

In my opinion one of the most beautiful types, as a fact one of the most varied. The wild type axolotl can be, green, brownish, black, leopard spotted, or light brown. They have irridophores that make them shine like glitter. The amount differ from lot to lot. They are the most common lot as their types are determined by the dark gene which is dominant. Because of this any wild type parent is (practically) guaranteed to have some wild type babies no matter what it is mated with.

Leucistic type

This type has lacks a dominant dark gene and presents as a pink body with black eyes. They may also have pigment on their faces (called dirty leucistic).

gfp lucy
GFP Dirty Lucy: Photo by Ariel Caldwell

Melanoid Type


Most are very similar to a dark wild type with one key difference. Melanoid axolotls do not have any glitteriness to them. The lack of iridophores can be easy identified by looking for a shiny copper or silver ring around the pupil of the eye. Melanoids usually come in dark black to light gray coloring but can be presented in other types as the only true defining characteristic of Melanoids is the lack of iridophores. This is what I when I said the genes act independently of each other. It is totally possible to have a Melanoid albino that is just a normal looking albino that lacks any iridophores. Some light melanoids with spots are called dalmation lots.

Xi

White Albino Type

The albino axolotl comes in two different types, the white albino and the golden albino. Both have red eyes and carry the recessive albino gene that controls lack pigment production. The white albino is white or light pink with red eyes. It lacks a dark gene and has iridophores. Also simply called the albino.

axo

Golden Albino

The golden albino is somewhat of an odd ball. Usually an albino creature is unable to produce any color pigment however because the dark gene is separate, when the dark gene is dominant it presents yellow pigment. However the rest of the colors are prevented by the albinism gene. Making an albino with a yellow back. This is not a perfect explanation as it is a bit more complicated but works for our purposes. The golden albino may also be melanoid and lack irridophores but still have the golden color, seperating it from the axanthic albino.

Totec

GFP axolotl

Any lot can be GFP if it possesses the dominant gene.

gfp eli prather

Rarer Types

Axanthic axolotl

The axanthic axolotl lacks any yellow pigment or iridophores. The total creation of this makes a somewhat of a very dark purplish colored lot. These are sometimes called purple lots as well.


Axanthic albino

Similar to the golden albino is also carries the dark gene but also has two recessive axanthic genes which stop melanophores, xanthophores and iridophores, thus making it totally white but lacking the iridophores of the white albino.

Copper axolotl

Again a newer type that unlike the axanthic axolotl just appeared in the gene pool. American strains of coppers are identified by red eyes and light brown coloring. There are reports of a different line of coppers from other countries but no official typing has been named. Occasionally called olive type as well.

Curple (copper purple) axolotl

Carry characteristic of both the axanthic and copper axolotl.

Genetic mutations

I will preface this section by first saying that these guys are expensive! Some are made in labs, some are freak accidents. Regardless they cost a minimum of $200 dollars and can top out at thousands. They are genetically modified and cannot be bred for. These are not recommended for beginners.

Piebald

Perhaps the most ‘common’ natural mutation is the piebald. Piebalds are leustic axolotls that contain pigment all down their sides and back instead of just the face. It is not known exactly why the pigment may present in a ‘dirty-faced’ lucy’s head alone but it does not naturally occur in the other parts of the body unless it is a piebald.


Chimera

Similar to the Mosaic genetically but split down the middle. Embryos are separated and fused with another lot and produce characteristics of both in each. This is usually split down the middle.

Mosaic

The king-pin of axolotl collectors. The mosaic is a natural mutation where different cells in the body are coded for different genes. This means that some of the cells think they are a wild type axolotl and make xanthophores and iridophores but the other cells think they are albino and do not make any pigment at all. A common misconception is that breeding two mosaics can lead to a higher chance of mosaic babies. The ‘higher chance’ is minimal to non-existent and is only theorized due to their already unstable genetics. Mosaics can also be sterile. When split at the tail they are considered ‘firefly’ lots. These are usually lab created.

justin mosaic
Mosaic: Photo by Justin Scott


Eli Prather Frirefly
Fire Fly axolot (Right) Lucy (Right) Photo by Eli Prather


Thank You to all those who provided pictures!

Axoltols · Beginner · Illness

So You Have a Sick Lot….

So you have a sick/injured axolotl?

I would like to start this by saying; a sick axolotl does not make you a bad pet owner. These are animals that live in a closed environment where a lot of things can easily go wrong and you would be none the wiser. It doesn’t matter how you got here, what matters is that you are here and what you are going to do next. As a rule the best way to stop and illness is to prevent it. Keep water clean and cool and remove waste. Notice changes in diet and pooping as a first sign that something is wrong.

First step: Tubbing

This first treatment for just about any axolotl illness or injury is quarantine. This is done by a process called tubbing. Ideally you have a totally cycled hospital tank set up but this is often not the case. Most axolotl owners tub in a size relative food safe container. It should be as long as your lot in one direction and twice as long in the other. The food safe is important as it means that there will be little to no leeching from the chemicals in the plastic into the water. All tubs need a lid but it should not be sealed or else air cannot reach inside. Make sure to place the tub someplace it will remain sub 70 for the comfort and improved health of you lot. Anything over 70 will stress your lot and encourage opportunistic infections.

tubbed

(Note: These lots are not tubbed together, they are just in the same space during a quick water chage. Keeping different sized lots in the same small space can result in injury and death)

Tubbing allows for 3 things; separation, improve environment and supervision.

When tubbed the lot is separate from whatever the cause of the illness. Illnesses can be brought in via plants, shrimp, food, or other lots you have added to your tank. Some fungal and bacterial illnesses live in the air and will colonize your tank whenever certain parameters are met.

The environment when tubbed is also improved because the smaller space allows more strict and careful care of your lot. It is important to note that while tubbed YOU MUST CHANGE YOUR WATER DAILY. This is the advantage cycled hospital tanks have over tubs as they are cycled. The tubs are not and the ammonia must be removed by a daily water change for as long as they lot remains tubbed. Make sure to use dechlorinator.

Close supervision is also much easier with tubbing. Because many of the axolotls hides have been removed in the process it is important that the tub itself is kept in a consistent dark room. If a room cannot be kept dark wrapping a towel around the tub and using an opaque lid will work fine. When checking on your lots health be sure to turn down all unnecessary lights. Lift the lid carefully and slowly as to not startle your lot. Examine your lot closely for any fuzzy spots, shedding of skin, red spots, or changes in appearance/behavior (these will be covered below). Replace the lid before you leave the room.

Identification

Now that your lot is safe they can start healing. The second step is where we get lot specific. Here you are going to try to diagnose the problem. Even if you are taking them to a vet, taking note of what make be affecting your axolotl can help your vet treat it.

Fuzzy White Spots:

This is a common aquarium fungus. It is usually caused by water temps being too high or water parameters being off. These are harder to catch on lighter morphs of lots so be vigilant.


 (Photos curtosey of Angelesse Puckey)

Red splotches:

These are usually ammonium burns. They are almost always related to an uncycled  or crashed cycle tank that caused ammonia levels to spike leading to the irritation and eventual death of a lot. For these lots a 2x daily water change while tubbed is recommended. This may also present by a shorting/disappeaance of gills and loss of weight.

water quality lot
An axolotl kept in awful conditions. Remember, no gravel should be in any axolotl tank every.


Shedding skin, floaty white/clear thing:

This is your axolotls slime coat. Unlike a snake this should not happen and is not an indication of growth. It is important for keeping the skin safe and preventing infection. This is commonly confused with fngus. It usually peels due to a shallow injury (brushing across a ring while handling)  that does not result in bleeding or water quality issues. Making sure the water is clean is very important for your lot. While not as dangerous ammonia burns if the slime coat is not able to be rebuilt or it peels too often it can open your lot up to an infection. Note: Do not use slime coat improvement formulas on lots. They have been largely untested and many owners report lots acting adversely to it.

slime coat damage
Slime Coat peeling around gills. Note the general pulling away from the skin, unlike fungal growth. (Photo courtsey of Ariel Caldwell)

Red or white dots:

These can indicate a bacterial infection. While this can be treated if caught early enough it is time to call the vet.


Injury: This is a common problem for lots throughout their lives. Thankfully with their amazing regenerative skills it is often a minor issue. Still best not to press it, look for the source of the injury. They do bleed and it is red, any active bleeding still present after a few hours should be taken to the vet.

injury
A nipped golden (Provided by Carrie Ann Sjuts)

If they are stored with other lots there is a change of roommate inflicted injury. This usually happens when there is not enough space in a tank or not enough food. It can also happen on accident during feedings or with special need/ smaller lots (these should not be stored in a tank with other lots). Axolotls have poor eyesight and will snap at most anything that moves if they are hungry enough. I advise feeding while your lots at different spots in the tank. If you just can’t seem to catch them apart try to get them facing different directions. As a last resort very lightly cup your lot from underneath and float them to another part of the tank to feed.

If they live alone (or with others) look for anything in the environment that could cause the injury. Sharp edges should always be filed down and any decoration should be stable and not able to fall. Axolotls have little toes what can get caught in small holes so certain rocks like volcanic rock should be avoided. Axolotls also tend to like their hides, if you have a growing lot they may not notice they have gotten too big for a hide. When they outgrow a hide remove it from the tank before they risk injury from getting stuck.

Changes in appearance or behavior: When a lot stops eating it is usually a sign of stress. These lots may not need to be tubbed but may need a change in diet, a water change, or a vet. This is a wide category that contains things like genetic issues, cancers, bloating and morphing. I am only going to cover the common issues today.

Treatment Options

Salt bath

Add 4-5 teaspoons of NON IODIZED salt (no table salt)  to a gallon of water in a separate (ideally glass). Allow the water to become the same temp as the tank. Gently move the lot over to your salt bath. Allow it to sit no more than 15 minutes. After 15 minute it begins to irritate the lots skin and can cause injury to the slime coat and gills.

This should be conducted once a day for serious cases or 2 times a day (5 hours apart minimum) for 3 days before dropping to once a day. Salt baths should not continue for more than a week, anything persisting longer should seek veterinary care.

Why it works: The salt makes a toxic environment for the fungus by turning the water slightly basic and essentially fries the microorganisms while only mildly irritating your lot. This is why it is important to limit the time on salt baths.

Tea Bath

A tea bath is conducted with pure black tea. No added flavors, no preservatives, no weird colorants. If the ingredient label does not say just black tea do not use it (orange peako is a cut of black tea and safe). You can find it at your local supermarket and is often the cheapest of all the teas.

Brew a cup of clean and dechlorinated water to boiling. Add the black tea and allow it to seep before cooling back to room temp. (Make a cup for yourself why you wait, it will help you relax).  Once it has reached room temp add it 2.5 gallons of water to a container and chill to tank temp. Add your lot in for 15-20min for an adult. 10-15 minutes for juveniles.

Why it works: The caffeine and the tannins in the tea tighten the pores of the skin. The fungus can no longer root in the skin and will float off and away. The bacteria cannot seed in the skin and will not spread. Tea also has antibacterial properties.

Fridging (CAUTION)

Fridging is a last case scenario that should only be done as a last ditch effort. Serious injury, impaction or severe infection is the only reason for fridging. Impaction is when a lot is unable to pass something it has eaten, usually gravel, which is why we do not store things in their tank smaller than their head.  An example of a serious injury is a lot that has been attacked and won’t stop bleeding (when for whatever reason you cannot take them to the vet) and an example of severe infection would be the whole gill area being totally covered in addition to your lot not eating or moving.  To safely and least stressfully fridge a lot place them a large for size container that is wrapped in a towel. Remove the light bulb in the fridge as so not to stress the lot when you open and close the door. Generally it is colder at the top back of the fridge so keep them on the lower shelves toward the front. Keep the water clean with a reserve of clean water stored next to them to assure the correct temp. Turn up the fridge as high as it will go. Below 45 is dangerous to the lots health.

Why it works: The cold puts a stop of everything. Fungus/bacteria will not grow and slowly start to die. Your lot’s metabolism will slow and it will try to expel what it was in the middle of digesting (like a piece of gravel) and it’s blood will slow as well. All of this is very stressful for the lot and slows healing as well which is why it should only be used as a last resort.

Prevention: Yes I know, booo! Boring. But also very true. The best way to treat a disease is to stop it before it starts. Keep cool, clean water and remove any waste. Indian Almond leaves and driftwood can leech tannins which have the same effect (on a smaller scale) as tea baths and can be added to your tank. But they may turn your water brown.

Which Treatment?

Fungus: The best and easiest treatments for fungus is early detection. IF only one small fungus spot has been noticed the clean dechlorinated water should be enough to resolve the issue in a few days. If no improvement has been made a salt bath (severe condition) or tea bath (not that bad condition) may be in order.

Bacterial infection: If caught early a tea bath should just handle it. For severe infection treatment with furan 2 may be necessary. This is the only medication I can attest to being safe. Never give anything with malachite green as it can poison your lot. Refer to your vet.

Ammonia burns: Clean clear water changes will take care of it. Don’t do anything else to irritate the skin. Avoid handling and try to scoop the lot up in a different container during water changes instead of touching it if you can.

Peeling slime coat: Clean and clear water changes can solve minor issues. For full body peels provide a tea bath once a day for about 10 min. Do not pull or otherwise try to remove what is peeling. The lot may eat peeled off coat and this is okay, just leave them be.

Injury: remove the lot from its environment immediately until the cause has been determined. Keep water cool and clean while the wound closes. Do not use any other treatments. Encourage food as they need the extra energy to heal. I recommend doing the water change about 30 min after eating to maintain the best quality of water.

Other questions

My lot is shaking/ spasming what’s happening?

Your lot most likely has chlorine poisoning after a water change. Instantly remove them into previous water or another tank. If this is not possible add the dechlorinator immediately to the water. Monitor for any side effects. If this does not correct the behavior it could be a neurological problem.

(This Video was pulled from youtube. Do not follow the advice given in the comments)

My new lot hasn’t eaten is it sick?

Probably not. New lots get stressed when faced with an unfamiliar environment. That being said some breeders are not really ready to handle all that rearing lots takes and produce sick lots. Be sure to request pictures and information on health before you buy. Anything past a week of not eating is concerning (as they do not eat during transit either).

Is this fungus or slime coat?

Usually this happens on the gills. More often than not if you have to ask it is slime coat. Fungus looks like snow. If you aren’t sure hold off on further treatment and just do the water changes.


Remember it is always best to visit the vet if you can afford to and have a knowledgeable vet near you. Special thanks to the Axolotl-aholics Facebook page community for providing pictures!


Axoltols · Beginner

What You Need for Your First Axolotl: A Checklist

So you’ve decided to get an AXOLOTL! AHHHH! That’s great. Below is a list of things you will need in order to care for the newest member of your household and when you should/can get them. If you have questions feel free to ask the page or myself.

1-2 Months before getting your new pet

  1. No leak Aquarium

Sizes vary based on how many axolotls you plan on getting. I recommend one to start. You need at least a 20 gallon (75 liter) aquarium for your first axolotl and an additional 10 gallons (38 liter) for any additional one.  So if you want 4 lots you’ll need a 50 gallon(190 liter) tank minimum. (20 for the first +10+10+10) ‘Long’ or ‘breeder’ tanks are ideal for axolotls as they provide more floor space. If given the option, bigger is better. It makes it easier for you to manage and clean the tank and allows space for add-ons. They will never use land space as they are completely aquatic.

  1. A filter

Lots poop, a lot. Most aquarist are used to the filter handling this and not having to siphon a fully cycled tank for at least a month. Axolotls create a lot of waste and thus are considered ‘high bioload’ creatures. This just means they produce more waste and ammonia compared to your average fish. You will need a beefy filter rated for the minimum of your tank. Most hobbyist recommend a size up to handle the extra bioload. There are a variety of different filters to choose from but keep in mind that your axi should be able to swim against any current. You can break up any current by placing a breakwater (pictured below) near the outflow causing the current. Sponge filters are recommended because they do not create a current.

21731183_10203620169901142_8880547699349375936_n

  1. Dechlorinator

Prime is the most readily available one in the states. You add this to tap water to make it aquarium safe. Most tap water contains deadly chloramines and chlorine which burn your axolotol’s skin. It is better to operate under a ‘safe than sorry’ mentality and assume your water has chlorine than not. You can test for sure with various kits online.

  1. Water test kit

This is non-negotiable. You need this for two main reasons. The first is that it will help you determine if your tank is cycled and ready for an axi or not. Second is to determine the overall health of the tank once your axi moves in. If your axi gets sick or starts behaving differently, the first question you will be asked will be ‘what are your water parameters?’ Without knowing them it will be difficult to determine and treat the problem. ( I will be adding a treatment guide soon.)

These come in strips, liquid test kits, and electro kits. Get the liquid test kit. Strips are cheaper up front but more expensive in the long run and often very inaccurate. This could affect the early catch of a disease or a cycle crash and lead to a hurt and sometimes dead axi. A 20-30$liquid test kit can last you over a year (400 test). Test should be done daily during a cycle and every water change. Additional testing may be done when treating a sick axi. If you have the spare money Electro kits are the MOST accurate but also horribly expensive which is why most people stick with the liquid kits.

  1. Ammonia

You will need a source of ammonia for cycling. Popular sources in the hobby are decaying fish flakes, liquid ammonia, and feeder fish. Liquid ammonia is generally the easiest and most reliable.

  1. Thermometer

The second question asked when you have a sick axi will be ‘what are your water temps?’. You must be able to tell the temp in the tank as axis are cold water pets. The specifics are listed later under the ‘chillers and fans’ section below but for now don’t worry about it as your cycle will complete faster at room temp before you chill the water.

  1. Lid

While this should go into the tank information I feel as if it is important enough to warrant its own section. You need a lid. While not common, axolotls can jump. It is not worth the risk of coming home to find your axolotl on the floor. Avoid the lids with lights as they can stress your axi unless you keep them off. They can be useful for planted tanks but I do not recommend a planted tank for a beginner.

2 weeks before

  1. Tank decorations

One of the best parts of aquariums is decorating them to suit your tank. However, there are some things you should know to keep your new pet happy and healthy.

  1. Hides: Axi’s need a way to hide from light, each other, that scary movement they just saw. These must be aquarium safe and not have any paint or toxins that can leech into the water. Terra cotta pots are an ideal, cheap, and safe solution. A good rule for beginners is that if does not say aquarium safe, don’t buy it. If you are building hides, avoid using fishing line as a binding agent. This can hurt your axi. The only safe glue is silicone based.
  2. Substrate: Not strictly necessary as many axis live happily on bare bottomed tank. If you do use a substrate is must be fine enough to digest (fine grain sand) or large enough that your axi cannot fit it into their mouths (river rock bigger than 2-3 inches/ 5-8cm). All axis under 6 inches (15cm) should be kept off sand. Gravel is NEVER okay and can cause an impaction for your axi and kill it.
  3. Plants and other decorations: A list of axi safe aquarium plants will be posted and updated periodically. Axoltols tend to uproot and tear apart live plants. Every axi is different but keep this in mind when investing in decorations. Fake plants can be used effectively but, again, must be labeled as aquarium safe and must not have any sharp wires inside that could scratch your new pet. Silk flowers not listed for aquarium use tend to have dangerous dyes and sharp points that should be avoided. All other decorations should be aquarium safe and not have any sharp points.

2. Establish a food source

Different sizes of lots need different foods. I will not cover less than 3 inches(8cm) in size as these should not yet be sold as they are still considered babies. You must find your food source before you need it in case something happens to your stock. Do not buy yet but locate and figure out where you can get a steady supply.

3-4 inches/8-10cm: Bloodworms, blackworms, pellets, chopped up red wrigglers

5-6 inches/12-15cm: Cut up earthworms, pellets, shrimp, red wrigglers, feeder fish (not recommended for first time owners)

6 inch/15cm+: cut up earthworm, pellets, ghost shrimp, feeder fish.

All worms should be in basic dirt with no fertilizer. Worms are the only nutritionally complete diet, if feeding the other options they must be supplemented. Ask your breeder what they were feeding and how to supplement.

  1. Back up tank

Now is the time to set up a backup tank for your axi in case something happens in their tank or they get sick. This does not have to be a full tank but it is ideal. At the very least some large storage tubs are recommended as a fail-safe for ‘tubbing’ a lot in an emergency. The should be as wide as the axi’s body is long and twice as long in length.

  1. Chiller or fan

Axis are cold water amphibians and need the water temp to be at least 70 F(21c) or lower. The ideal temp is around 65F (18C). Chillers are great for larger tanks but expensive. If you only need to drop the tank a few degrees a fan blowing across the top of the tank water cause evaporation and will slightly cool it.

  1. Read ‘So you have a sick lot’ to be able to reconginze disease.

Week Of

  1. Food

Now is the time to pick up the food we mentioned earlier. It is also a good time to establish a backup source.

  1. Nets

You should avoid touching your axi as it can damage their protective slime coat. A net is ideal for movement between tanks and during water changes. It should have no sharp edges and a fine enough mesh that your axi’s limbs and toes will not get caught.

  1. Medications

There are some basic medications to have on hand at all times. Axi’s are very hardy creatures and almost any illness can be beaten if caught early enough. More information in the files section under ‘Axi illnesses and treatments’.

  1. Black tea: Only black tea listed on ingredients, caffeinated, and non-flavored. This is good to treat and prevent fungal and bacterial infections. Orange Pekoe is a cut of black tea and safe. It is not a flavoring agent. Available at local super markets.
  2. Salt: Used for severe fungal and bacterial infections. Must NOT have iodine in it. Sea salt or aquarium salt are ideal. Available at local super markets of pet stores.
  3. Furan-2 and methylene blue: Treat bacterial and ammonium burns respectively. These are actual medications and can kill your pet if used incorrectly. These are to be used only for serious cases that are too late for a salt or tea bath. READ THE INSTRUCTIONS AS EVERY KIT IS DIFFERENT.
  4. A vet:  Look for a local vet near you, although if every step is followed it is highly unlikely for you to need one. Still very good to have on hand.

Recommended

  1. A turkey baster

If you rely solely on your filter to handle waste you will be changing your water at least once a week. A turkey baster allows you to efficiently suck up waste and pull it out of the tank without losing tank water as well.

  1. Air pump

Some axi’s like current. Air pumps and air stones can be set up within a tank as long as the axi can still swim through and past it.

  1. Extra food

Sometime your axi will get picky and decide it doesn’t want whatever you usually offer. It is encouraged to keep a variety of food on hand if needed.

  1. A good camera

You WILL want pictures of these guys. Plus it will help identify any problems with your axi.

  1. Tank divider

This is always good to have on hand if you have more than one axi. It keeps bigger ones from hurting/killing smaller tank mates and prevents mating between a newly announced male and female. As a reminder, if keeping males and females in the same tank a divider must be used if they are breeding more than twice a year as it shortens the female’s life span. In addition check with your breeder to see if your lots are sibling as inbreeding is very dangerous for the hobby as a whole.

6.  Siphon

A siphon will allow you to pull out water from the tank via a hose. It allows you to move water more easily from larger tanks. They can be found at your LFS.


We are always glad to help and encourage questions. Any good breeder should also be able to answer your questions or know someone who they can refer your question to. . Thank you for reading and I wish you a long happy life with your new Axolotl.

Axoltols · Beginner · Introducing

Axolotls; the Derps of the Salamander World

What are they?

Ambystoma Mexicanum also known as: The Mexican Walking fish, Water Dragons, axolotls, Water Salamander. The axolotl is a member of the salamander, closely related to the tiger salamander of the northern region of the United States. The axolotl is a salamander that never leaves its larval stage. This means, unlike other salamanders, it never loses its gills and retreats to land. Instead, it lives its whole life in the water. Because of this axolotls don’t look all that much different from when they are ‘born’ (aka. Hatched). A forever baby if you will.  These guys are TOUGH and will withstand many of the missteps a new aquarist may make.

What do they look like?

An axolotl looks somewhat like a mix of a turtle without its shell and a lion. Their bodies are close to the ground and very short and wide when compared to their tail. Long fluffy gills surround their neck like a mane to absorb O2 from the water around them. They com in a variety of colors including: Gold, Pink, White, Black, Brown, Green, Gray, purple (rare), blue (rare), and a genetic mutation called mosaic where there is a mix of 2 of the colors above!

Where do they come from?

Native to Lake Xochimilco the lake under Mexico City, the axolotl is either critically endangered or extinct (depending on who you talk to) in the wild due to pollution and destruction of their natural habitat.  Not to worry, the pet trade is alive and well with the cute little squashes. Almost all of the pet trade axolotls are and have been bred for generations. Scientist often sampled the wild population due to the axolotl’s unique genetics and regeneration.

Wait genetics? Regeneration?

Yes, that’s right. The unique thing about axolotls is that all of their genes for color, albinism, iridophores (sparkley-ness), and eye colors all lie on different genes that are independent of one another. This leads to a whole host of different colors and characteristics that an axolotl can be. Some even glow under black light (called GFP for the green fluorescent protein that causes the occurrence)!

Scientist also love the axolotl’s regeneration skills. Many salamanders are capable of disconnecting their tail from their body as an escape to flee predators. It will then regrow over a period of time to exactly the same length and width it was before. While the axolotl may not be able to disconnect its tail, it has a far neater trick. The axolotl is capable of regrowing any part of its body when kept in healthy conditions. This is more than just healing wounds, an axolotl can regrow whole limbs that have gone missing, bone and all! There is a variety of research currently being conducted, but most is trying to relate this regeneration to a specific protein so it may one day be replicated in humans!

So what do they do?

Honestly, not much. Many people see this interesting looking animals and excitedly bring one home only to later find out there’s not much to see. An axolotl is what I compare to a water cat. They sleep, then move to eat, then sleep, then eat again, then play for a while, until they get tired and fall back to sleep. Never the less they are very interesting aquarium inhabitants and move gracefully through the water.

Where can I get one?

Most axolotls in the US come from private breeders. This is often the way to go as axolotls need individualized care when rearing. Some breeders sell to local pets stores but if your LFS can order them from their big box supplier I would stay away, they often don’t have the means (or care) to take care of the young as they should.

I want one! What do I need?

Don’t worry, there is plenty of information of axolotls out there. I will be uploading a care sheet soon that contains all you would possibly need to know to buy your first one! As far as where to get it, try local fish and amphibian pages to avoid shipping. Otherwise there are national pages online where you can have one shipped to your house in just a few days. (They are very resilant creatures but local pick up is best).

Aquatic Plants · Planted tank

Getting Started with Aquatic Plants

8tc96m0WfKUGknghYsZ_NlcEQI_4wDN8wmPH1W01zm8
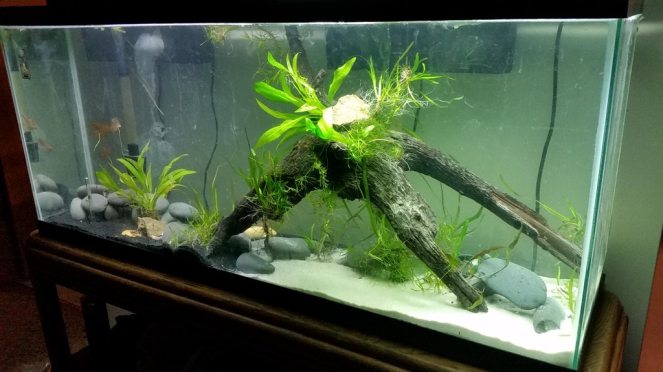
Plants are a fantastic addition to most any aquarium (even brackish with the right plants). While finding the right plant may take longer than one would think it can be a very rewarding experience and contributes to nitrate and ammonium removal from the water column. Plus it just looks great.

Quick Preach Before We Get Started

The problem is they are often expensive, hard to find or both. Often times new hobbyist may try to solve this by placing a found plant from another ecosystem into their tank. THIS IS NOT A GOOD IDEA! I cannot stress that enough. It can lead to toxicity if eat, introduction of infections or parasites, or just die off in the tank leading to a mess. If you are unfamiliar with the local fauna you can remove a plant that is vital to the ecosystem and cause a crash.

Conversely, never EVER place anything from your aquarium into a wild ecosystem. (The only ones getting a pass on this are conservation scientist who are specifically trying to reintroduce a population into a habitat.) This can reverse all the negatives of a wild plant into your tank and turn it on the natural ecosystem. While you may think releasing a goldfish into the wild will make a better life for it, the goldfish will probably die and could introduce a disease as well leading to mass deaths with in a population. “But my tank is healthy! Disease free!” you may be thinking. And you would be correct, from what you can see. However, a well-kept, happy aquarium can mean breeding grounds for a variety of dangerous microorganisms that your fish aren’t bothered by due to your diligent care. In a much less controlled environment the population could explode and wipe out whole ecosystems. There is also the issue of invasive species which I may cover with more detail later. The gist being, keep your tank, in you tank.

That being said, I do occasionally pull from the wild. (I NEVER add back. Even if it came from the wild originally DON’T put it back.) I follow a very rigorous procedure involving quarantine, an invert exposure tank, and a ‘feeder’ fish expourse tank (full of hardy, resilient fish) before introducing anything to my more sensitive aquatic pets, like axolotls, tropical fish, and more expensive inverts. This is not a beginners process and requires years of plant identification, basic knowledge of microbiology, many tanks, and a lot of time.

On to fun!


How much do live plants cost?

Plants can cost from $0-$100 based on what you are looking at. Most freshwater plants cost between $3-$12 dollars depending on the condition and quantity. You may be able to find some free cuttings (trimmed plants) from a local fish hobbyist group but be warned that the persons tank may not be like yours so you should carefully consider the addition. ( A salt water coral will quickly die in a freshwater tank) Always quarantine.

Where do new plants come from?

Aquatic plants can be purchased three ways.

One: Cuttings. These are plants that have been ‘cut’ from a section of the adult plant and set to start a new plant. Some also grow from the roots of the adult plant and sprout up elsewhere as a pup (think baby plant). Imagine a taking a tree branch and burying it your front yard… and it grows. Awesome right, but cuttings can be troublesome for the adult plant if they are pruned to often. Cuttings also can die if they don’t establish themselves in their new tank quickly enough. No roots = no nutrients, no nutrients = plant death. You can buy established cuttings as free-floating but they are more likely to fail. The best way for new hobbyist to purchase them is in pre-planted pots that contain a growth substrate for the roots to establish themselves.

Two: Seeds. Not many aquatic plants can be cultivated from seeds but some do work. s genetic diversity, where cuttings are just clones of the parents. I recommend beginners stay away from seeds due to their conditional and temperamental nature when it comes to sprouting.

Three:Terrestrial plants (aquatic plants grown in soil then moved to the aquarium). I do not reccomend this option for beginners as fertilizers can posion your tank and cleaning the plants can be a problem.


Where can I find plants for my aquarium?

The easy answer is the ‘fish store’. The harder answer is ‘it depends’. Many plants purchased from pet stores have hitchhikers such as snails and worms (some harmless, some not). Rarely, aquatic plants can carry something dangerous or toxic to your fish if stored or grown incorrectly. Plants should always be quarantined (kept in seperate tanks with similar conditions) so you can see any adverse changes such as snails falling off or pH changes. Only ever buy an aquarium plant for an aquarium,  plants meant to grow above water will never work. If you are sold a ‘partially submerged’ aquatic plant that means that part of the plant can be underwater (usually stem and roots) but a portion must remain above water (usually leaves and flowers).

How can I tell if a store is safe?

Never buy anything for your tank from a store you don’t trust. The things I always look for in petstores is how the hold their ‘common pet’ animals. For fish, take a look at the ‘feeder fish’. These are what are commonly sold as pet goldfish. They are often genetically unstable, sick, or malformed. While this is a questionable ethical practice it is to be expected with feeder fish. What you don’t want to see is dead fish. The best time to check is afternoon. Now, like I said feeder fish are unstable and they live a very short life, you may see a dead one or 2. However, a good petstore will a have an employee remove any dead fish at least once usually twice a day. Once in the morning and once in the afternoon. If there are many dead fish floating around that either means the store isn’t removing the dead fish often enough (which poisons the water) or there is an illness killing off the fish sooner than they can remove them. Dead fish in a specialized tank is a hard no for me. These are the fish that cost $5 and up. If they are dying and not being removed the store doesn’t care about it’s fish which means they are most likely not getting the care they need. If plants are stored in this water they can carry (not have) the infection in the water they are transferred in.

How can I tell if a plant is safe for my fish?

The answer is research. Google ‘Betta Fish safe plants’ or if you want a certain plant ‘is hornwort safe for bettas?’ Some plants are dangerous for a fish to ingest, some will just get destroyed by the fish. Be sure to find out why a plant is or isn’t safe for a fish and go from there.


That’s all for today. Feel free to ask any questions. I will be adding more details on some of the more advanced topics we glossed over in future post. Enjoy your planting!